For Sale

Showing all 84 results
-

‘Epoxy Sleeving’ and Lapping Bolt Lugs for Accuracy (DVD)
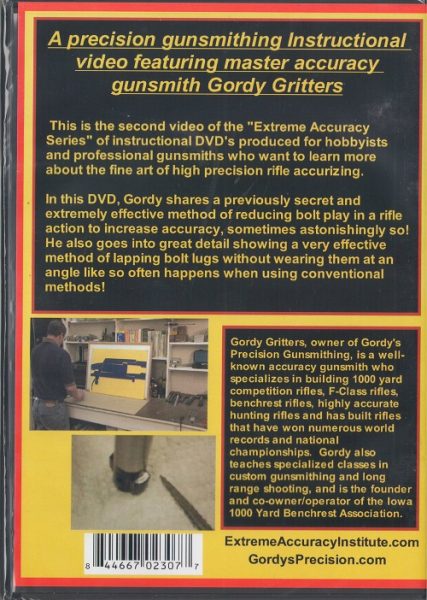
$49.94In this Course, Gordy Gritters, well known benchrest gunsmith and competitor, shares a previously proprietaty secret and extremely effective method of reducing bolt play in a rifle action to increase accuracy, sometimes astonishingly so!
He also goes into great detail showing a very effective method of lapping bolt lugs without wearing them at an angle like so often happens when using conventional methods.
These two techniques go hand-in-hand to correct issues that have a major impact on the accuracy of a rifle! Gordy’s clients rely on him to wring out all the accuracy possible from thier rifles, you and use the same methods to improve your guns.Another great instructional video. Return to Gordy’s expert instruction as often as you like to get every detail correct.
-
Sale!
10 Minute Deer Skinner
Original price was: $28.99.$22.95Current price is: $22.95.How many times have you said, “Now that the animal is down, The fun stops and the work starts.”
Not so with this handy tool.
• Absolutely the fastest and easiest way to skin a deer • Keeps meat clean from hair and other contaminants • Professional method of skinning, minimal cutting and reduces nicks in hide • Uses the power of your vehicle to quickly and efficiently remove deer skin The 10 Minute Deer Skinner is the most time efficient method that we’ve found (using the least amount of physical effort) to take a deer from the buck pole to the deep freeze. Simply field dress your deer and placed on a clean sheet of plastic before the 10 Minute Deer Skinner is utilized.
STEP 1: Extend the skin cut on the deer from the field dressed cut to the base of head. (Two to four inches from the head.) From the end of this cut, make a complete circle around the neck, connecting with the original cut. Important: Cut skin only, not the meat.
STEP 2: Attach loop of plain cable to an immovable object (tree, stump, ball hitch of parked vehicle, etc.). Slip the loop on the other end of plain cable around the deer head, behind the ears, and hand tighten. From cut on back of neck, pull hide back toward the tail six (6) to ten (10) inches.
STEP 3: Cut skin on each front leg from knee joint to brisket cut. Make a cut circling the knee joint. Note: DO NOT PULL SKIN. Again, cut skin only, not meat. Brush hair off drop cloth, and clean area around the deer, so the skinned carcass will drop on a clean surface.
STEP 4: This step will utilize the two stage ball and skinner plate for hide removal. Take the long cable that contains the skinner plate and two stage ball and place the skinner plate (flat surface down) on the raw side of the hide. Push the small end of the two stage ball from the hair side of the hide, through the hole in the skinner plate. Hand tighten cable around the narrow section of the two stage ball by pulling only on the coated end of the cable.
STEP 5: Advance vehicle (slowly) to remove slack. Hunter should stand to the side of deer for safety reasons and to signal the driver. Vehicle should be advanced (see Figure 4) until skin is removed to the hind leg joints. Cut skin around each back leg between knee and ankle joint. Resume truck advancement (if necessary) until skin is completely removed. Your deer should be completely skinned and dropped back on a clean, plastic surface.
Note: If the animal has been down for an extended period of time, the front legs of the deer may need to be moved toward rear to permit clean skin removal around the legs. Also, if the hide is to be kept, skin tail by hand (as shown in video). Finally, if the hide is to be tanned, split each back leg open from hind quarter to end of leg.
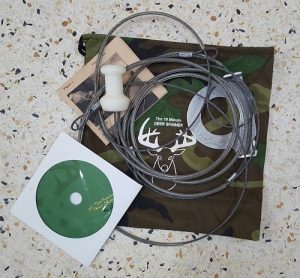
Kit includes: Both Cables with the skinner system fully assembled and ready to use. Written instructions, a DVD with an instructional video on how to use the 10 Minute Deer Skinner and a pouch the carry it all in. Make Skinning Fun!
-
Sale!

10 Minute Deer Skinner x 2 and get a free knife
Original price was: $69.90.$37.95Current price is: $37.95.Buy 2, 10 Minute Deer Skinners and get this knife Free!
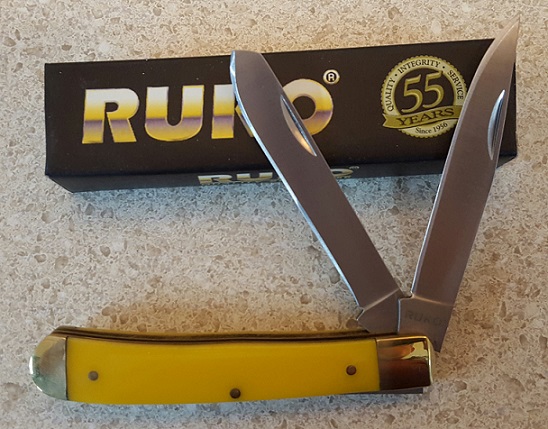
• Absolutely the fastest and easiest way to skin a deer • Keeps meat clean from hair and other contaminants • Professional method of skinning, minimal cutting and reduces nicks in hide • Uses the power of your vehicle to quickly and efficiently remove deer skin The 10 Minute Deer Skinner is the most time efficient method that we’ve found (using the least amount of physical effort) to take a deer from the buck pole to the deep freeze. Simply field dress your deer and placed on a clean sheet of plastic before the 10 Minute Deer Skinner is utilized.
STEP 1: Extend the skin cut on the deer from the field dressed cut to the base of head. (Two to four inches from the head.) From the end of this cut, make a complete circle around the neck, connecting with the original cut. Important: Cut skin only, not the meat.
STEP 2: Attach loop of plain cable to an immovable object (tree, stump, ball hitch of parked vehicle, etc.). Slip the loop on the other end of plain cable around the deer head, behind the ears, and hand tighten. From cut on back of neck, pull hide back toward the tail six (6) to ten (10) inches.
STEP 3: Cut skin on each front leg from knee joint to brisket cut. Make a cut circling the knee joint. Note: DO NOT PULL SKIN. Again, cut skin only, not meat. Brush hair off drop cloth, and clean area around the deer, so the skinned carcass will drop on a clean surface.
STEP 4: This step will utilize the two stage ball and skinner plate for hide removal. Take the long cable that contains the skinner plate and two stage ball and place the skinner plate (flat surface down) on the raw side of the hide. Push the small end of the two stage ball from the hair side of the hide, through the hole in the skinner plate. Hand tighten cable around the narrow section of the two stage ball by pulling only on the coated end of the cable.
STEP 5: Advance vehicle (slowly) to remove slack. Hunter should stand to the side of deer for safety reasons and to signal the driver. Vehicle should be advanced (see Figure 4) until skin is removed to the hind leg joints. Cut skin around each back leg between knee and ankle joint. Resume truck advancement (if necessary) until skin is completely removed. Your deer should be completely skinned and dropped back on a clean, plastic surface.
Note: If the animal has been down for an extended period of time, the front legs of the deer may need to be moved toward rear to permit clean skin removal around the legs. Also, if the hide is to be kept, skin tail by hand (as shown in video). Finally, if the hide is to be tanned, split each back leg open from hind quarter to end of leg.
Kit includes: Both Cables with the skinner system fully assembled and ready to use. Written instructions, a DVD with an instructional video on how to use the 10 Minute Deer Skinner and a pouch the carry it all in. Make Skinning Fun!
-
Sale!

10 Minute Deer Skinner x 2 and get a free skinning knife
Original price was: $69.95.$39.50Current price is: $39.50.Buy 2, 10 Minute Deer Skinners and get this knife Free!
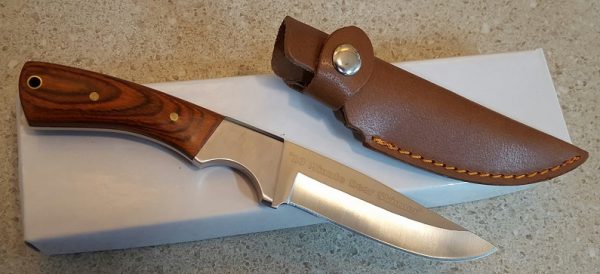
• Absolutely the fastest and easiest way to skin a deer • Keeps meat clean from hair and other contaminants • Professional method of skinning, minimal cutting and reduces nicks in hide • Uses the power of your vehicle to quickly and efficiently remove deer skin The 10 Minute Deer Skinner is the most time efficient method that we’ve found (using the least amount of physical effort) to take a deer from the buck pole to the deep freeze. Simply field dress your deer and placed on a clean sheet of plastic before the 10 Minute Deer Skinner is utilized.
STEP 1: Extend the skin cut on the deer from the field dressed cut to the base of head. (Two to four inches from the head.) From the end of this cut, make a complete circle around the neck, connecting with the original cut. Important: Cut skin only, not the meat.
STEP 2: Attach loop of plain cable to an immovable object (tree, stump, ball hitch of parked vehicle, etc.). Slip the loop on the other end of plain cable around the deer head, behind the ears, and hand tighten. From cut on back of neck, pull hide back toward the tail six (6) to ten (10) inches.
STEP 3: Cut skin on each front leg from knee joint to brisket cut. Make a cut circling the knee joint. Note: DO NOT PULL SKIN. Again, cut skin only, not meat. Brush hair off drop cloth, and clean area around the deer, so the skinned carcass will drop on a clean surface.
STEP 4: This step will utilize the two stage ball and skinner plate for hide removal. Take the long cable that contains the skinner plate and two stage ball and place the skinner plate (flat surface down) on the raw side of the hide. Push the small end of the two stage ball from the hair side of the hide, through the hole in the skinner plate. Hand tighten cable around the narrow section of the two stage ball by pulling only on the coated end of the cable.
STEP 5: Advance vehicle (slowly) to remove slack. Hunter should stand to the side of deer for safety reasons and to signal the driver. Vehicle should be advanced (see Figure 4) until skin is removed to the hind leg joints. Cut skin around each back leg between knee and ankle joint. Resume truck advancement (if necessary) until skin is completely removed. Your deer should be completely skinned and dropped back on a clean, plastic surface.
Note: If the animal has been down for an extended period of time, the front legs of the deer may need to be moved toward rear to permit clean skin removal around the legs. Also, if the hide is to be kept, skin tail by hand (as shown in video). Finally, if the hide is to be tanned, split each back leg open from hind quarter to end of leg.
Kit includes: Both Cables with the skinner system fully assembled and ready to use. Written instructions, a DVD with an instructional video on how to use the 10 Minute Deer Skinner and a pouch the carry it all in. Make Skinning Fun!
-
Sale!
204 Ruger Gauges
$32.95Description for the product.
-
Sale!
22 RimFire Headspace Gauges
$32.95Description for the product.
-
Sale!

22-250 Remington Gauges
$32.9522-250 Remington Headspace
-
Sale!

220 Swift Gauges
$32.95Description for the product.
-
Sale!

222 Remington Gauges
$32.95Description for the product.
-
Sale!

222 Remington Magnum Gauges
$32.95Description for the product.
-

223 Remington Gauges
$35.99Description for the product.
-
Sale!

244/6mm Remington Gauges
$32.95Description for the product.
-

257 Roberts or 7×57 Mauser Gauges
$35.99 -
Sale!

280 Remington
$32.95280 Remington or 7mm Express gauges
-
Sale!

284 Winchester Forster Headspace Gauges
$32.95Headspace Gauges: For Sale
-
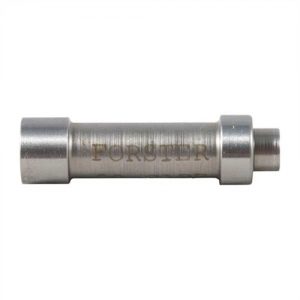
30 Carbine Gauges
$35.9930 Carbine or 30 M1 Carbine
-

30-06 Springfield Gauges
$35.99Also works with 22-06, 6mm-06, 25-06 Remington, 6.5-06, 270 Winchester, 8mm-06, 338-06 and 35 Whelen
-
Sale!
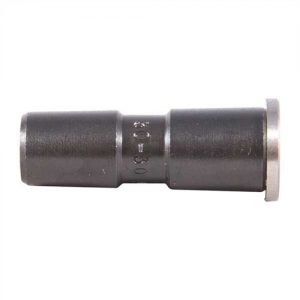
30-30 Rimmed Gauges
$32.95Description for the product.
Works with multiple cartridges:
219 Zipper, 219 Donaldson Wasp, 22/30-30, 25-35 WCF, 7-30 Waters,
7mm International, 30-30 WCF, 30 Harrett, 303 Savage, 307 Winchester,
32-40 WCF, 32 Winchester Special, 356 Winchester, 357 Herrett, 375 Winchester and 38-55 WCF
-
Sale!

30-40 Krag, Rimmed Headspace Gauges
$32.95Description for the product.
Works with: 30-40 Krag, Krag Wildcats, 303 British, 40-70 Straight
-

300 AAC Blackout Gauges
$35.99 -
Sale!
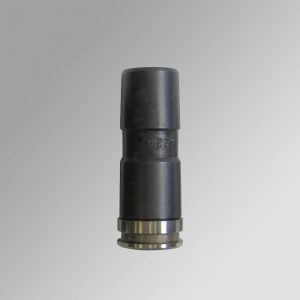
300 Belted Magnum Gauges
$32.95Description for the product.
Works with belted magnums with a .535″ diameter belt.
257 Wby, 264 Win., 6.5 Rem. Mag., 270 Wby., 275 H&H, 7mm Rem. Mag.,
7mm Wby., 7×61, 300 H&H, 300 Win. Mag., 30-338 Win., 300 Wby., 308 Norma,
8mm Rem. Mag., 338 Win. Mag., 340 Wby., 350 Rem. Mag., 358 Norma,
375 H&H, 400 H&H, 416 Rem. Mag., 416 Taylor, 458 Winchester, 458 Lott.
-
Sale!

303 British Rimmed Gauges
$35.99Description for the product.
Works with multiple cartridges:
30-40 Krag, Krag Wildcats, 303 British and 40-70 Straight
-

308/243 Winchester Gauges
$35.99Description for the product.
Works with: 22-243, 243 Winchester, 7mm-08 Remington, 308 Winchester, 338 Federal and 358 Winchester
-
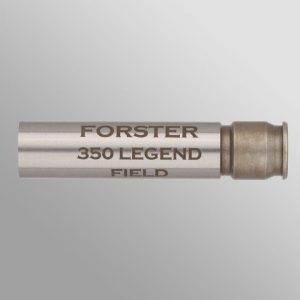
350 Legend, Forster Headspace Gauges
$35.99Headspace Gauges: For Sale
-
Sale!

460/378 Weatherby Belted Magnum Gauges
$32.95Description for the product.
Works with belted magnums with a .585″ diameter belt.
30-378 Weatherby. 338-378 Weatherby, 378 Weatherby, 460 Weatherby
-

6.5 Creedmoor, Forster Headspace Gauges
$35.99Headspace Gauges: For Sale
-

6.5 Grendel, Forster Headspace Gauges
$35.99Headspace Gauges: For Sale
-

6.5×55 Forster Headspace Gauges
$35.99Headspace Gauges: For Sale
-

7.62x54R, Forster Headspace Gauges
$35.99Headspace Gauges: For Sale
-

8×57 Mauser Forster Headspace Gauges
$35.99Headspace Gauges: For Sale
-
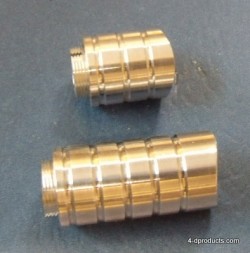
Bedding Pillars, Rem 700
$24.95Remington 700 adjustable pillars. Buy stand alone or use to refill the Gunsmith’s pillar bedding kit.
-
Sale!
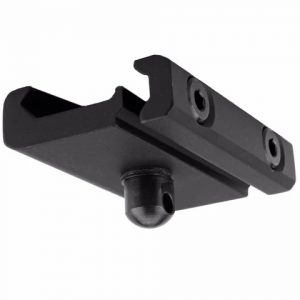
Bipod Stud Rail Mount
Original price was: $39.95.$32.75Current price is: $32.75.GrovTec Bipod Stud, rail mount for picatinny rails.
Allow installation of common bipods on a pic rail.
-

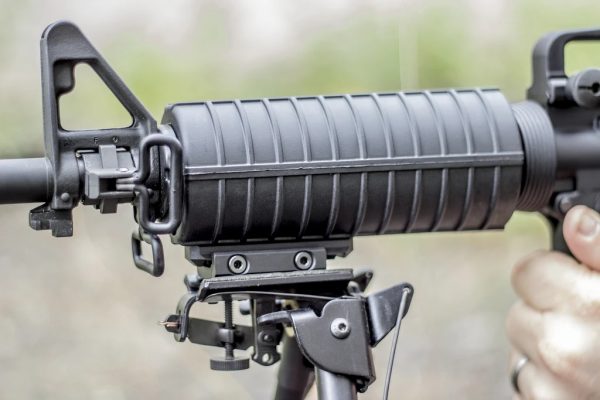
Bolt Knob, 2 Panel (Dakota)
$18.95Dakota cast bolt knobs for custom replacements. 2 raised panel replacement bolt handle, limited supply.
Future availability unknown.
-
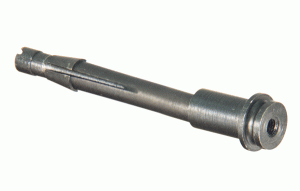
Broken Shell Extractor 223/5.56
$6.95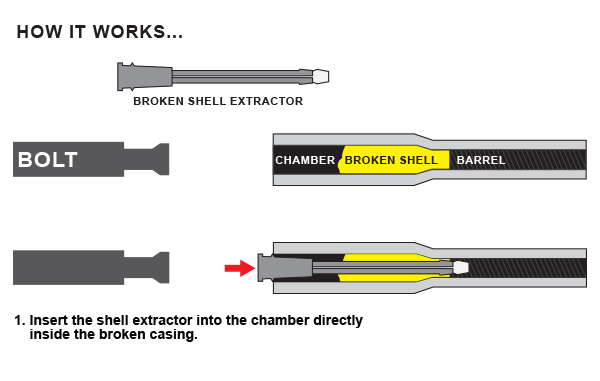
-

Browning Hi-Power Pistols
$39.95DVD Gunsmithing course by AGI
-
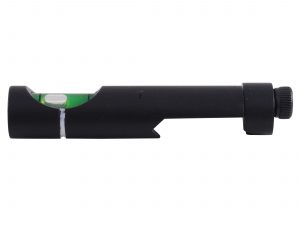
Bubble Level, SME (Weaver Dovetail)
$15.95The SME Bubble Bore level allows the shooter to check both the rifle bore and the reticle alignment at a glance. Constructed of aircraft grade aluminum.
Specification: SME Bubble Bore Level
Material: Aluminum
Notes:
- Attaches to any Weaver-style rail or base.
- Ambidextrous Mounting
- Assures bore alignment at a glance.
- White line on housing for quick reference.
- Hex wrench for mounting included
-

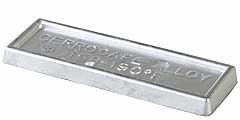
CERROSAFE® 1/2 lb ingot
$15.95Cerrosafe, chamber casting alloy 1/2 pound ingot.
Purchase, not rental.
-
Sale!

Chambering for Ackley Cartridge (booklet)
Original price was: $29.95.$24.95Current price is: $24.95.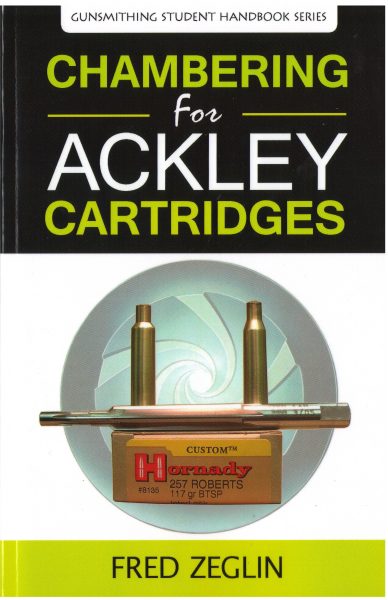
Gunsmithing Student Handbook Series #1
This booklet is the first of many planned works that provide instruction in the correct and safe methods of gunsmithing. Specifically, this essay discusses Ackley Improved cartridges. In it, we will not teach you how to install and chamber a barrel, we handle that information in another title, “Chambering Rifle Barrels for Accuracy”. In this book we will in detail help you to understand the special details related to chambering for Ackley Improved designs, specifically we explain headspace for Ackley designs.
If you are not familiar with how headspace applies to firearms and ammunition you may want to consider another title we offer, “Understanding Headspace for Firearms”.
Fred Zeglin along with other well-known Gunsmiths has begun the task of creating a series of instructional manuals. Each book will focus on one narrow subject in Gunsmithing. Written with an audience in mind who want to know every detail of the how and why of gunsmithing.
Each book in the series will provide a highly detailed and Technical explanation of the subject at hand in a way that any gun lover will be able to understand, whether professional or hobbyist.
44 pages, soft bound. Printed in the U.S.A.
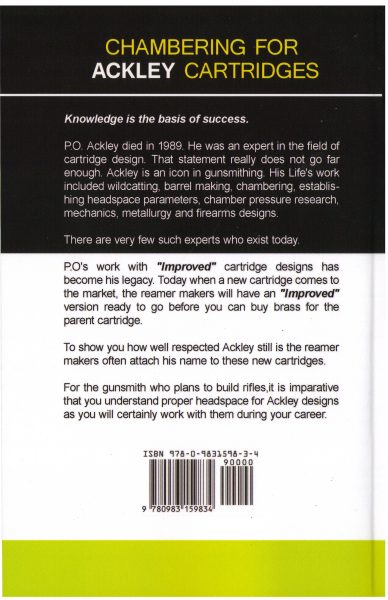
Back Cover of Chambering for Ackley Cartridges.
“The material and information inside will last you a lifetime. This is a PRACTICAL handbook.” Gary Howes, GunsAndGunsmiths.com
-

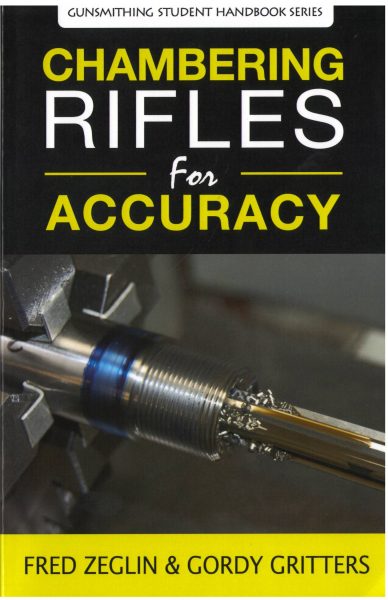
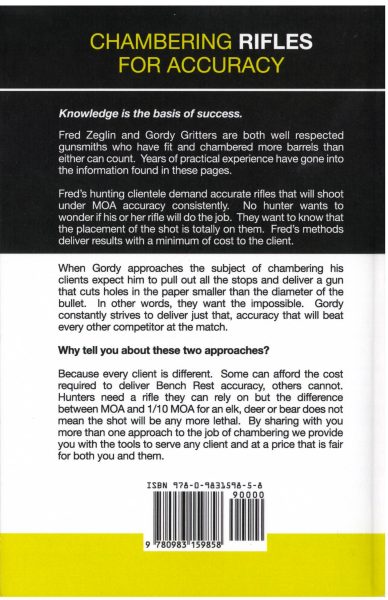
Chambering Rifles for Accuracy (book)
$49.95Third of many planned works that provide instruction in the correct and safe methods of gunsmithing.
Specifically, this essay discusses several methods that can be used to accurately chamber a rifle barrel. In Part I of the book Fred Zeglin teaches you all about accurate hunting rifles and discusses the variables that must be dealt with in order to create an accurate hunting rifle. In Part II Gordy Gritters, famed benchrest gunsmith, shares every secret he has learned over the last 30 years. Gordy finishes the book with a step by step process for bench rest barrel work.
If you are not familiar with how headspace applies to firearms and ammunition you may want to consider another title we offer, “Understanding Headspace for Firearms”.
Each book in the Gunsmith Student Handbook Series will focus on one narrow subject in Gunsmithing. Written with the audience in mind these books are for shooters who want to know every detail of the how and why of gunsmithing. Whether you plan to build guns or not, each book in the series will provide a highly detailed and technical explanation of the subject at hand, in a way that any gun lover will be able to understand. Professional or hobbyist will enjoy this read.
123 pages, soft bound. Printed in the U.S.A.
-
Sale!

Checkering, A book of checkering for the beginner
Original price was: $48.95.$46.85Current price is: $46.85.Paperback, 8.5×11
176 pages.
Sherman L. Mays assembled this how to manual from his considerable experience checking for a living. He has taught many others to checker and for this reason his book is excellent at showing the novice how to get started and the mistakes to avoid. His easy going and often humorous style makes this a pleasant read and the prolific use of photos aid in your understanding of the subject.
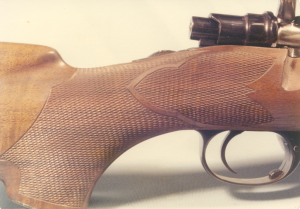
Mays shows many patterns and details in his book on checkering.
If you have ever wanted to learn how to checker this book is ideal for building skills and saves you a lot of time learning your way around the difficulties every student of checkering faces. Instead of working all by yourself, invite Sherman, via this book to come into your shop to stay. Handbooks are at their best when they become a well loved reference book, I think this book will be just that.
There are nearly 300 pictures used to show you the details that matter.
Mays starts with teaching you how to cut that first line and then increased the difficulty of each project like any good instructor would. Even a reluctant student would have no reason to avoid cutting their first line of checking in a few short hours after acquiring this text.
Free shipping on this Book.
-
Sale!

Custom Cartridges
Original price was: $78.95.$69.95Current price is: $69.95.Designing and Forming Custom Cartridges for Rifles and Handguns By Ken Howell
Brand new copies of Ken Howell’s classic text on cartridge dimensions. This book has been out of print for several years. Fred Zeglin at Z-Hat Publishing located a stash of books in a warehouse. We have them available for sale to our clients.
-

Ebook: Gunsmith Tools, Cutters & Guages – A Primer
$10.00This is a Generic Epub file format.
The Ebook can be opened and viewed in many readers including Microsoft File Viewer and numerous Free E Reader apps available online.
We also stock a print edition, click here.
We spoke with leaders in the tool making industry about the things they spend most of their time and effort educating clients about. Contributions from Clymer, Forster, Manson, JGS, PTG, SAAMI and more are all included. There are books for machinists that teach this type of information, but until now there has never been a book for gunsmiths that explains the tools of the trade and how they should be utilized. The idea is simple, answer your questions before you order any tool.
Nomenclature is important, when you talk to a reamer maker, gunsmith or client you want to know the correct terms. This indicates to those you work with that you took the time the understand the tools. It will improve your ability the sell work to customers, buy or rent the right tools for the job. You will save untold hours and dollars, don’t learn at the “School of Hard Knocks”.
When you understand tools, they work better and last much longer. This both saves money and increases profits.
-
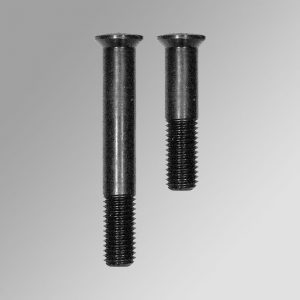
Forster – Trigger Guard Screw Sets
$7.49These simple tools allow you to keep the barreled action properly aligned in the stock during the inletting process. Without them it is very difficult to get a tight inlet.
- 98 Mauser
- Springfield 03, 03-A3 and Krag actions
- Remington 700, 721, 722
- Savage 110
- Winchester 70
- Sako
-
Forster Datum Dial
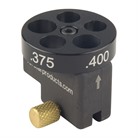
$89.95The Forster Datum Dial makes it possible for the handloader or gunsmith to use ordinary dial calipers to make normally difficult length measurements based on the case shoulder. By measuring cases to the datum line on the shoulder, the reloader can custom-fit the ammunition to a rifle’s chamber for the best possible fit for better accuracy potential and longer case life.
Gunsmiths can easily check the length of customers reloads verses the chamber.
This tool can also be used to double check headspace gauges if questions arise
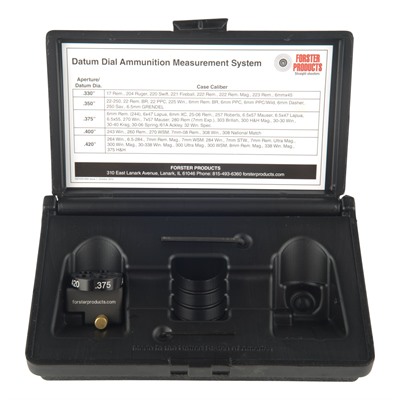
Datum Dial in box, from Forster
Included are complete instructions, storage box, and a laminated chart with common datum diameters.
-
Forster Datum Dial Kit
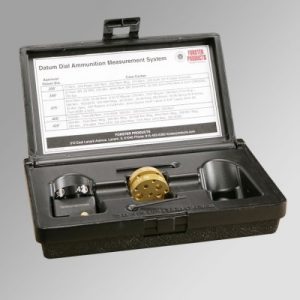
$132.95The Forster Datum Dial Kit makes it possible for the handloader or gunsmith to use ordinary dial calipers to make normally difficult length measurements based on the case shoulder. By measuring cases to the datum line on the shoulder, the reloader can custom-fit the ammunition to a rifle’s chamber for the best possible fit for better accuracy potential and longer case life.
The gold “bullet dials” makes it easy to accurately determine bullet seating depth measured from the ogive when changing the seater die setting or when checking loaded rounds for consistency. It can also be used to check the bullets alone for variations that could hurt accuracy.
The Complete Kit includes the Body with Case Dial for checking cases and two Bullet/Cartridge Dials. The #1 dial fits 224, 243, 264, 284, and 308 calibers. The #2 dial fits 172, 204, 257, 277, and 338.
Gunsmiths can easily check the length of customers reloads verses the chamber. Seating depth verses throat, and uniformity of ammunition. All errors that can make problems hard to diagnose.
This kit can also be used to double check headspace gauges if questions arise.
Included are complete instructions, storage box, and a laminated chart with common datum diameters.
-
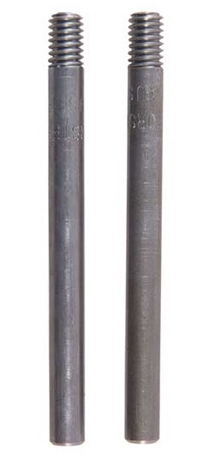
Forster Inletting Guide Screws (Stock Making)
$8.95These simple tools allow you to keep the barreled action properly aligned in the stock during the inletting process. Without them it is very difficult to get a tight inlet.
- 98 Mauser
- Springfield 03, 03-A3 and Krag actions
- Enfield 1914, 1917 and SMLE
- CZ 550 or 7.7 Jap Arisaka
- Remington 700, 721, 722
- Winchester 70 or 54
- Sako
-
Sale!
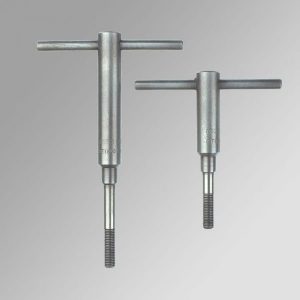
Forster Stock Makers Hand Screws (Stock Making)
$19.95These simple tools allow you to keep the barreled action properly aligned in the stock during final fitting.
Recommended by stockmakers, these Forster Stockmakers Hand Screws are used in the final accurate fitting of the stock to the action. These screws are precision made and hardened to make repeated trial fittings. Set of two.
To save time and to avoid damaged guard screws or a ruined stock, don’t attempt to inlet a stock without the proper stockmakers hand screws.
- 98 Mauser
- Remington 700, 721, 722
- Winchester 70 or 54
- Enfield P-14 or P-17
- Springfield or Krag
- Sako: Except, Model 75
- Ruger 77
- 7.7 Jap Arisaka
- 6.5 Jap
-
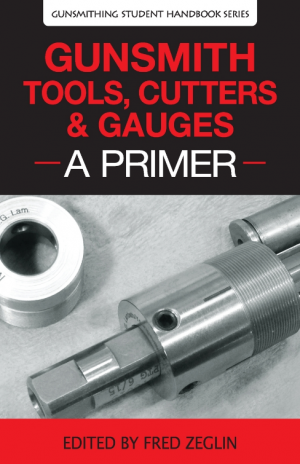
Gunsmith Tools, Cutters & Gauges – A Primer
$12.95Shipping Now!
We spoke with leaders in the tool making industry about the things they spend most of their time and effort educating clients about. Contributions from Clymer, Forster, Manson, JGS, PTG, SAAMI and more are all included. There are books for machinists that teach this type of information, but until now there has never been a book for gunsmiths that explains the tools of the trade and how they should be utilized. The idea is simple, answer your questions before you order any tool.
Nomenclature is important, when you talk to a reamer maker, gunsmith or client you want to know the correct terms. This indicates to those you work with that you took the time the understand the tools. It will improve your ability the sell work to customers, buy or rent the right tools for the job. You will save untold hours and dollars, don’t learning at the “School of Hard Knocks”.
When you understand tools, they work better and last much longer. This both saves money and increases profits.

What is discussed?
All types or reamers specific to firearms work
Reamer Holders
Reamer Stops
Use of Reamers
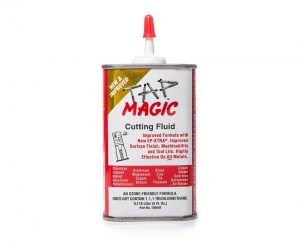
Cutting Lube
Chip Welding and how to Stop it.
Misconceptions About Reamers
Chatter and its Cures
Shotgun Chamber Tools
Forcing Cone Reamers
Shotgun Chokes
Screw Choke Tooling
Measuring for Choke Tubes
Choke Lube
Defining Headspace
Choosing the Correct Gauge
Improved Chambers and Headspace
Headspace Gauge Interchange Chart
Charts for Tooling and bushings.
EBOOK NOW AVAILABLE TOO.
-
Sale!

Hawk Cartridges Manual
Original price was: $32.85.$28.75Current price is: $28.75.Hard cover reloading manual for Hawk Cartridges.
180 pages.
10 years of research went into the collection of data for Hawk Cartridges. This book includes all the data collected for all calibers. This unique line of wildcats is base on the concept of non-belted cartridges that deliver magnum velocities at pressures that are appropriate for the available brass. Most of the data includes pressure test results.
Fred Zeglin of Z-Hat Custom took the time to carefully assemble this data in a format that is useful to the reloader and student of ballistics.
Several articles both old and new are included to illuminate the Hawk Cartridge line-up. History and technical information, including how to form brass is all included. Very specific information about selecting correct brass for the cartridge you like.
Dimensions for all cartridges are included, no secrets here.
Everything you need to know to be successful with this line of Cartridges.
-
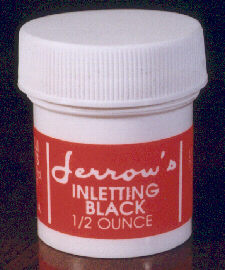
Jarrow’s Inletting Black
$14.85JERROW’S INLETTING BLACK The standard among stock makers since 1963! Does not dry out or soak into the wood. Leaves a good clear mark, yet cleans up easily. A small amount goes a long way. Positively the best products on the market for precision hand fitting of gunstocks, knife handles, cabinet furniture; all precision inletting. Inlay / fit parts to wood with ease.
-

Jarrow’s Inletting Gold
$19.95JERROW’S INLETTING GOLD
Inletting Gold is for those very dark woods and ebony forends that Inletting Black just won’t work on. Also works well on fiberglass and composite stocks. The standard among stock makers since 1963! Does not dry out or soak into the wood. Leaves a good clear mark, yet cleans up easily. A small amount goes a long way. Positively the best products on the market for precision hand fitting of gunstocks, knife handles, cabinet furniture; all precision inletting. Inlay / fit parts to wood with ease.
-
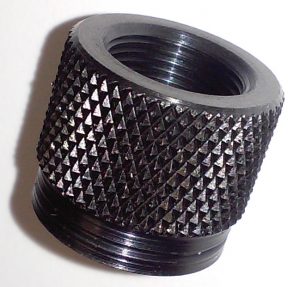
Muzzle Thread Protector
$0.00Knurled nut that threads on the muzzle of your barrel to protect the threads when your muzzle device is removed. Made in the USA of chromoly steel, black oxide finish.
-
AR, 1/2 x 28 x .700″ outside diameter, fits most AR-15 barrels and any barrel .700″ at the muzzle.
-
Glock, 1/2 x 28 x .641″ outside diameter, fits Glock 17 & 19, most 9mm barrels.
-
Ruger 10-22, 1/2 x 28 x .920″ outside diameter, fits 10-22 bull barrels.
-
Sporter, 1/2 x 28 x .625″ outside diameter, fits many light tapered barrels.
-
Varmint, 5/8 x 24 x .750″ outside diameter, fits AR-10 and any barrel with a .750″ muzzle.
-
-
Sale!

P.O. Ackley, America’s Gunsmith
Original price was: $54.95.$49.95Current price is: $49.95.“P.O. Ackley, America’s Gunsmith is so extensive and so well done,
I am at a loss to adequately describe it!” Dennis ‘Mike’ Bellm, Bellm TC’sBook, Hard cover, 256 pages.
Parker Otto Ackley left a wealth of firearms knowledge among those he trained. The eminent gunsmith, ballistician, barrel maker, teacher and writer perhaps had more influence on modern shooting and firearms than any other single man. And now his life and works have been painstakingly detailed in P.O. Ackley: America’s Gunsmith.
Writer and gunsmith Fred Zeglin gives a never-before-seen look at the humble man whose research thrust the firearms industry forward. From improving rifle chambers for use with modern powders to developing superior barrels to designing red-hot cartridges, readers will walk away with a new appreciation for Ackley’s exploration and ideas. And his concepts on reloading, rifle accuracy, safety, cartridge choice, and wildcat use are just as relevant for today’s “gun cranks” as they were in Ackley’s heyday.
Zeglin also delivers the most complete collection of accurate dimensions, loading data and history for the lifetime of cartridges created by P.O. Ackley, the most influential gunsmith in American history. Most shooters today know him because of his “Ackley Improved” cartridge designs. But those cartridges are only the tip of the iceberg. P.O. Ackley: America’s Gunsmith is the whole story.
Bonus: Full-color photo section and an exclusive never-before-printed article by P.O. Ackley.
How this book will raise your firearms IQ:
Wildcat and standard cartridge history
Accurate technical information
Colorful Ackley quotes and entertaining Ackleyisms
Descriptions and reloading data for Ackley Improved cartridges
Now Shipping! Autographed copies.
“Any gunsmithing student, reloader, shooter will find him or herself fascinated
by this work. No library is complete without it.” Gary Yee, author of
“Sharpshooters 1750-1900” & “Sharpshooters, Marksmen Through the Ages”About the Author
Fred Zeglin has been building custom hunting rifles for nearly thirty-five years. Zeglin has taught classes for the NRA Short Term Gunsmithing program at three separate colleges and is the Coordinator/Instructor for the Firearms Technology program at FVCC in Kalispell, MT. He has published two other books, Hawk Cartridges Manual and Wildcat Cartridges, Reloader’s Handbook of Wildcat Cartridge Design.
Fred is maintaining a web site about P.O. Ackley, this allows him to keep updating as more details come to light. https://ackleyimproved.com
Fred has signed all the books we are shipping.
-
Sale!
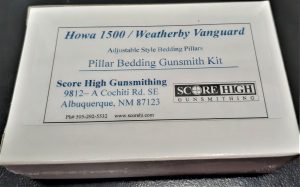
Pillar Bedding Gunsmith Kit, Howa 1500 or Weatherby Vanguard
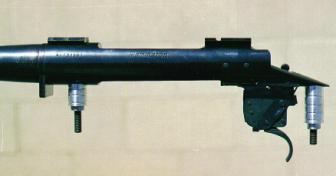
Original price was: $52.95.$49.95Current price is: $49.95.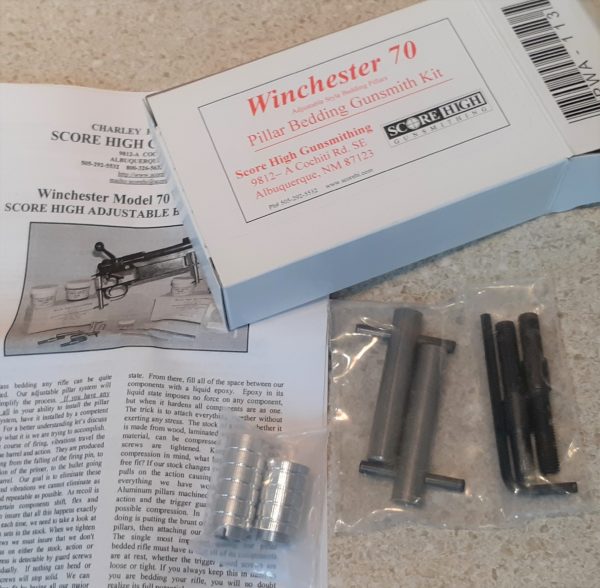 Aluminum pillars machined to mate between the action and the trigger guard will eliminate any possible compression. In a sense what you are doing is putting the brunt of the load on rock solid pillars, then attaching your stock to these pillars. The single most important quality pillar bedded rifles must have is that all of its components are at rest, whether the trigger guard screws are loose or tight, I.E. stress free bedding.
This easy to use kit allows the user to adjust the pillars to match the stock. You can assemble everything for bedding and know it is aligned for error proof bedding jobs.
Complete instructions included with the pillars and tools.
-
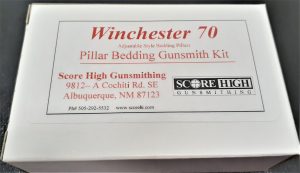
Pillar Bedding Gunsmith Kit, Winchester 70
$49.95 Aluminum pillars machined to mate between the action and the trigger guard will eliminate any possible compression. In a sense what you are doing is putting the brunt of the load on rock solid pillars, then attaching your stock to these pillars. The single most important quality pillar bedded rifles must have is that all of its components are at rest, whether the trigger guard screws are loose or tight, I.E. stress free bedding.
This easy to use kit allows the user to adjust the pillars to match the stock. You can assemble everything for bedding and know it is aligned for error proof bedding jobs.
Complete instructions included with the pillars and tools.

-
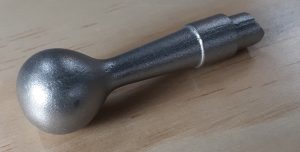
Plain Universal Replacement Bolt Handle (Dakota)
$18.95Dakota cast bolt knobs for custom replacements. 2 raised panel replacement bolt handle, limited supply.
Future availability unknown.
-
Sale!

Reloader’s Handbook of Wildcat Cartridge Design
Original price was: $64.95.$62.95Current price is: $62.95.NOW IN STOCK!
Your Gateway to Customized Cartridges!
Unlock the world of wildcat cartridge design with the Reloader’s Handbook of Wildcat Cartridge Design, 2nd Edition. This comprehensive guide is the ultimate reference for reloaders, offering insights into designing, building, loading, and shooting wildcat cartridges. From the diminutive .10 caliber to the robust .50 cal., the book covers a vast range of calibers, catering to every shooter’s preferences.
Featuring three new chapters, this updated edition delves into modernized wildcats, recently developed proprietary and factory cartridges, ammunition sources, and creative solutions for acquiring .22 rimfire ammo during scarcity. Explore dimensioned drawings, loading data, detailed cartridge descriptions, historical wildcat cartridges, and profiles of renowned wildcatters like P.O. Ackley.
Whether seeking increased velocity, improved accuracy, extended range, or superior terminal performance on game, this handbook equips you with the knowledge to create your own reamers, reloading dies, and innovative cartridges. Take your reloading game to an entirely new level with this indispensable guide!
Hardback, 488 pages, copious illustrations.
Inside You’ll Find:
- •Dimension-ed drawings and loading data
- •Detailed cartridge descriptions and performance
- •Historical wildcat cartridges and new designs
- •Wildcats vs. improved cartridges
- •Tooling, supplies and suppliers
- •P.O. Ackley and other wildcatter profiles!
All of Fred Zeglin’s books sold by 4D are autographed by the author.
-
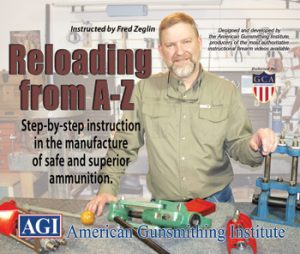
Reloading From A to Z, DVD (AGI Reloading/Gunsmithing Instruction)
$289.95
Reloading from A-Z is a course with nearly 8 hours of information in video format you can watch as often as you like to brush up or pick up a new skill.
The Liberals at YouTube don’t want you to see this.
Learn how-to make hand loaded ammunition tailored specifically for YOUR needs. This course is far more in depth than any other reloading course on the market. Renowned cartridge designer, gunsmith, and AGI instructor Fred Zeglin begins this course by addressing reloading from its most basic fundamentals. This allows the new reloader to begin the process almost immediately with confidence and safety. He goes further and introduces you to tools that increase the speed and quality of the reloading process.
Popular tools offered by numerous manufacturers of reloading gear are demonstrated and explained. He also covers casting bullet techniques and advanced precision reloading for long range shooting.
Most people learn reloading strictly from a mechanical ‘monkey see, monkey do’ view point. In other words, nobody ever completely explains to them WHY operations are performed a certain way or WHAT value they have. In this course Fred shows you, from a gunsmiths perspective, what is happening to the brass when fired and when it goes through the reloading process. This information will make you a well informed reloader and if you’re a gunsmith, will help aid in diagnosing problems with your clients’ reloads and guns.
Accuracy is always the name of the game for any shooter. Fred talks about what makes a safe, accurate reload and shares simple tricks that will save you hours of trial and error at the reloading bench and range. Obviously, this translates into saving money on components as well.
Our Special price here is for the course without the Certification from AGI. If you prefer to acquire the Certification we can arrange that or you can buy direct from AGI.
We are often asked, “Why So Much?” Well its nearly 8 hours of intensive instruction, in a friendly conversational style that makes it all easy to understand.
As a bonus Darrel Holland’s “Advanced Reloading Techniques” is included in the package.
-
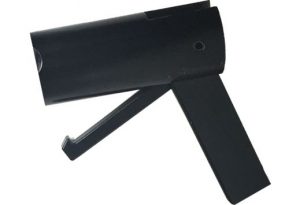
Remington 700 Bolt Disassembly Tool
$54.99Removes striker assembly in seconds for fast disassembly of all Remington bolts. Works with spring relaxed or cocked. Hook fits into the notch of the firing pin head. Rotating the lever pulls firing pin head back and locks it. Fast and easy.
-
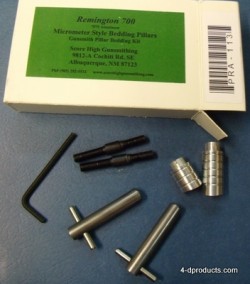
Remington 700 Pillar Bedding Gunsmith Kit
$49.95 Remington 700 Gunsmith’s pillar bedding kit comes with a set of adjustable pillars and installation tools for a perfect job every time. Full instructions included. refill pillar kits available separately. Just add your favorite bedding compound.
 -

Rental Protection Plan
$75.00Seems like a lot of money… Why should I do this?
For a short description click here.
Rental Protection Plan (RPP) units as described below, once purchased, remain in effect for all future orders until protection plan units are utilized for damages on an invoice. So this plan clearly benefits repeat customers the most. Rental Protection Plan is optional, if not purchased all standard rental terms apply to every order.
If customer participates in the Rental Protection Plan, Lessee/Customer will be charged a Rental Protection Plan fee. The Rental Protection Plan fee is $75 per unit for up to $300 (average value of one reamer and set of gauges) in repair or replacement costs. More than one unit of Rental Protection may be purchase if you intend to rent multiple tools. Only full units are offered, each unit is the same cost and value.
4D Reamer Rentals LTD is the final arbiter of tool condition and therefore when the Rental Protection Plan units are utilized to pay for replacement or repair of Tool(s). Once utilized the plan units are of no further value and new Rental Protection Plan units would need to be purchased to protect lessee’s future rentals. Protection per unit is up to $300 in loss but no partial use is permitted once applied to an invoice the unit is expired and of no value.
Under the standard rental agreement the lessee is responsible for the rental fees and up to the full amount of the deposit value for any lost or damaged tool(s). Lessee by purchasing RPP units is greatly reducing the potential cost for lost or damaged tools. Rental Protection Plan fees are non refundable.
Lessee/Customer understands and agrees that the Rental Protection Plan is NOT insurance. In exchange for the Rental Protection Plan fee, 4D Reamer Rentals LTD agrees to reduce the Lessee/ Customer’s exposure for loss and damage to rented Tool(s)/Item(s) on the contract/invoice in certain situations, as detailed below:
RENTAL PROTECTION: Rental Protection Plan is optional.
By Lessee/Customer accepting RENTAL PROTECTION Plan and paying the additional charge set forth, subject to the exceptions listed below Lessee shall be entitled to the following protection:
- Tools will be re-sharpened or replaced at no charge up to the limit of the Rental Protection Plan units purchased, when necessary. Deposit values listed on the price list and web site are the dollar amount that will be applied to damaged or broken tools when the RPP is utilized.
- All small parts, such as c-clips, screws and bushings are covered for damage or loss.
- Lessee shall not be responsible for ongoing rental expenses for the lost or damaged item(s)/tool(s) while they are out of service.
- If tools are lost in shipping and the carrier cannot locate them and/or the insurance carrier on the package refuses to pay, you are protected.
EXCEPTIONS: Notwithstanding the foregoing, Lessee shall remain fully liable for all loss and/or damage to Tools resulting from:
-
- Loss or damage resulting from overloading or abusing the Tools.
- Loss or damage resulting from lack of lubrication or other normal treatment of tools.
- Loss due to theft or mysterious disappearance, in short you must still support tracking and location efforts if tools disappear.
- Loss in return shipping if you do not insure your return packages, you will need a receipt and tracking info.
- Loss or damage caused by negligence or infidelity of Lessee, his employees, or persons with whom the Tools are entrusted.
- Use of Tools in violation of any of the Rental Terms, or any manner inconsistent with the manufacturer’s instructions, including but not limited to neglect, misuse, wrong application, or abuse of the Tools.
- No modification of any kind are permitted on our tools! EVER!
- Use or operation of the Tool(s) in violation of any law, regulation or ordinanace.
The RENTAL PROTECTION PLAN IS NOT INSURANCE. RENTAL PROTECTION does not provide liability or property damage coverage or any type of insurance coverage. Lessee remains responsible for all personal injuries or property damage related to operation/use of the Tools. If Lessee has insurance covering such loss or damage, Lessee shall exercise all rights available to him/her under said insurance, take all action necessary to process said claim, and Lessee further agrees to assign said claim and any and all proceed from such insurance to Lessor where the Lessor has experienced the loss. Upon request of Lessor, Lessee shall furnish name of insurance agent, insurance company, and complete information concerning insurance coverage carried. Rental Protection Plan is optional, if not purchased all standard rental terms apply to every order.
-
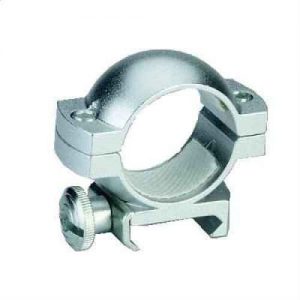
Scope Ring set, Medium, Silver
$7.95Medium, 1 inch scope rings. Matte Silver finish. Weaver style bases.
-
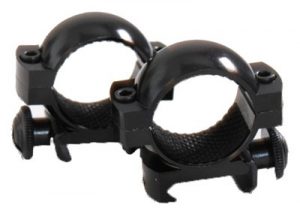
Scope Ring, High, Gloss
$7.95High 1 inch scope rings. Gloss Black finish. Weaver Style
-
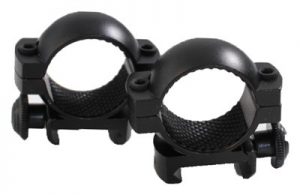
Scope Ring, High, Matte
$7.49High 1 inch scope rings. Matte Black finish. Weaver style bases.
-

Special Offer
$89.00

Special Combo price for buying the Hawk Reloading Manual (book) & the Taming Wildcats DVD at the same time.
With shipping you would pay a little over $100 for these two purchased separately at regular price. With this Special you get both for $89 shipped and… Fred will sign the Hawk Manual.
Hurry we can’t do this forever!
-
Sale!

Stock Work for the Beginner
Original price was: $54.95.$49.95Current price is: $49.95.by Serman L. Mays
363 pages, 8.5″x11″ format.
Some readers may recognize Sherman Mays as the author of a fine instructional book on Checkering.
He assembled the book about stock making for anyone who wants to learn about the craft or start making stocks.
Simple and complex stock repairs as well as inletting new blanks Sherman covers it all.Many stock makers starting out do not realize the many details that can go into a new stock. This book is extensive in its coverage of details like stock fitting to provide the shooter with the best ergonomics. Specifics like installing recoil pads, both fixed and adjustable are explained. Professional tricks for installing or inletting grip caps. Finishing stocks for a professional result and what tools work best. Sherm even touches on checkering, because not stock is really complete until it has been checkered.
A great book for wood lovers who want to build stocks for their guns.
-
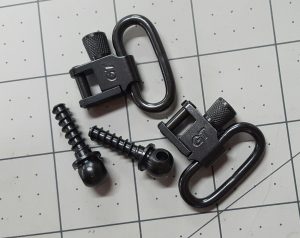
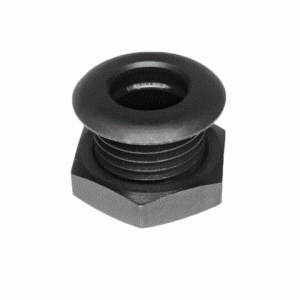
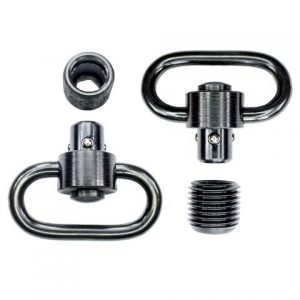
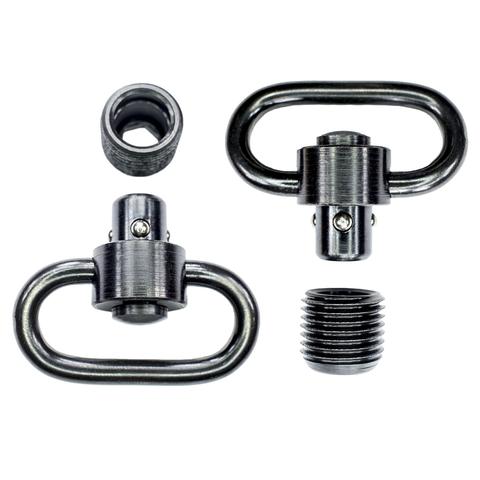
Swivel Stud & Swivel Set, custom ball design
$18.954D is now offering Sling Swivel Studs with a Ball head in stead of the common Dome. Providing a custom touch to your gun. Included is a set of GroveTec locking sling swivels (1″ loops) Price here is for one pair of these custom swivel studs and one pair of swivel loops.
These are 3/4″ long wood screw style studs.
-
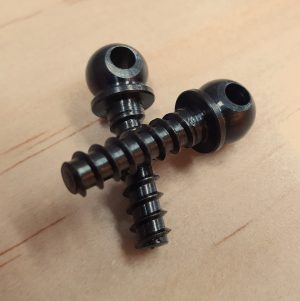
Swivel Studs, custom ball design
$9.954D is now offering Sling Swivel Studs with a Ball head in stead of the common Dome. Providing a custom touch to your gun. They come in the standard blue finish and can be color case hardened for a more custom finish. Price here is for one pair of these custom swivel studs.
These are 3/4″ wood screw style and will fit standard QD sling swivels.
-

Swivel Studs, custom ball design (BULK)
$58.954D is now offering Sling Swivel Studs with a Ball head in stead of the common Dome. Providing a custom touch to your gun. They come in the standard blue finish and can be color case hardened for a more custom finish. Price here is for 24 of these custom swivel studs in a bulk package.
These are 3/4″ wood screw style and will fit standard QD sling swivels.
-
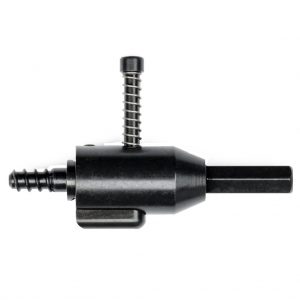
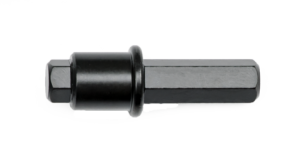
Swivel Studs, custom ball design, Intallation Tool
$21.95The premium choice for installing our custom ball swivel studs. Constructed of heat-treated carbon steel, this tool will not damage stock finish. Hex base designed to fit any standard drill chuck or 1/4-inch nut driver.
(Stud not included)
-

Taming Wildcats, DVD (AGI gunsmithing instruction)
$69.95A wildcat cartridge is a cartridge that is not commercially loaded by a major ammunition manufacturer, but could be loaded by a specialty or contract reloader.
Taming Wildcats: How To Design & Fabricate Custom Cartridges. Is one of AGI’s courses, taught by custom gunsmith Fred Zeglin, renowned cartridge designer and builder of the well-known Hawk series of cartridges, will get the viewer on the road to a thorough understanding of Wildcats and Wildcatting. Great material for any gunsmith or do-it yourself-er who want to make the tools themselves.
One doesn’t need to be a master machinist or tool and die maker to be able to turn out the blank resizing / forming / chamber reamers on the lathe; a tool post grinder is not needed. A bench grinder with a good fine grinding wheel and some practice will, with Zeglin’s expert and easy to follow guidance, will enable the viewer to turn out reamers that will equal anything one can buy! Talk about self reliance.
This video is a valuable addition to your library if you want to know how to design and build custom cartridges, reamers and reloading dies. It provides detailed explanations and demonstrations.
This DVD includes:
Introduction to Wildcat and Wildcatting
The Five Design Steps
Canon Reamers
Resizing Die Reamers
Making a Reamer
Heat Treating a Reamer
Relief Grinding
Sharpening a Reamer
Forming the Brass
Making a Chamber Reamer
Using the Reamer
BONUS – Pages of information on resource material, tools, lubes and more! -
Sale!

The Bolt Action; a Design Analysis
Original price was: $79.95.$69.95Current price is: $69.95.This classic title by Stuart Otteson is reprinted by Z-Hat Publishing under license from the author.
It has been fully reset using the original artwork by the author. So the text and images are clean and sharp. This is not a scanned copy but a full republishing of this valuable work. If you love bolt action rifles this book is an absolute must for your collection. It is fully illustrated and includes design information about bolt actions that will amaze you and help gunsmiths build better guns with the factory specs. at their finger tips.
Hardbound, 290 pages.
First Volume
-

The Caliber .50 M2 Browning Machine Gun – How it Works
$16.95This book contains two training manuals from WW II about the operation of the Ma Deuce (Browning Machine-gun).
A short history of the gun by Fred Zeglin is included. 175 pages, paperback.
-
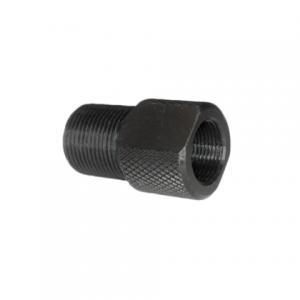
Thread Protector/Converter
$13.25GrovTec Thread Protector/Converter (adapter)
1/2″x28 thread – 5/8″x24 thead
-
Sale!

Understanding Headspace for Firearms (booklet)
Original price was: $32.95.$28.95Current price is: $28.95.
Understanding Headspace for Firearms will answer your every question about headspace.
This booklet is the second of many planned works that provide instruction in the correct and safe methods of gunsmithing. Specifically, this essay discusses Headspacing guns and ammunition.
A basic understanding of headspace and how it affects the proper operation of a firearm are necessary if you wish to call yourself a gunsmith. Otherwise all you will be able to do is change parts with the hope that somehow the problem will go away. This booklet contains all the information a gunsmith or reloader needs in order to understand and diagnose headspace in either the gun or the ammunition.
Fred Zeglin along with other well-known Gunsmiths has begun the task of creating this series of instructional manuals. Each book will focus on one narrow subject in Gunsmithing. Written with an audience in mind who want to know every detail of the how and why of gunsmithing.
Each book in the series will provide a highly detailed and Technical explanation of the subject at hand in a way that any gun lover will be able to understand, whether professional or hobbyist.
52 pages, soft bound. Printed in the U.S.A.

Back Cover of Understanding Headspace for Firearms.
“Understanding Headspace for Firearms.” Articles published here on Guns and Gunsmiths in the past on this topic have been some of the most highly read and commented on, so this book will be a treasure to many of you.” wrote Gary Howes of GunsAndGunsmiths.com when reviewing this book.
In the video below the Author tell you how to be sure your gauges are correct.
-
Sale!

Wildcat Cartridges, Reloader’s Handbook of Wildcat Cartridge Design
Original price was: $49.95.$25.95Current price is: $25.95.In 2005 the hard bound first edition of this handbook hit the market. Since that time it has become a collectable book. This reprint is a faithful reprint of the first edition, now in paperback form.
Fred Zeglin was a gunsmith and custom rifle builder long before he turned to writing. The origin of this book was formed in Fred teaching gunsmiths how to make reamer and reloading dies, as well as how the design and develop a successful wildcat cartridge with tried and true, safe methods.
The last Gunsmith to tackle this subject was P.O. Ackley in the early 1960’s. Fred took inspiration from Ackley’s writings to create a valuable snapshot of the wildcat community since Ackley left the range.
During Zeglin’s years in the gun business he has developed a large number of wildcats, both for his own use and for clients. He made chamber reamers and reloading dies for his customers projects, partly to save time & money, but mostly to deliver product for his clients that they really could not acquire anywhere else.
This manual contains ideas and methods that you will find in no other source. If you are a reloader, wildcatter or gunbug of any sort; you will enjoy and value the history and how-to information found in this book!
574 Pages, 6″x9″, paperback. Signed by the Author

