1/2″ x 28 Tap for AR / Muzzle Brakes
$15.00Muzzle brake tap, AR-15 Flash hiders and other common brakes.
Showing all 39 results

Muzzle brake tap, AR-15 Flash hiders and other common brakes.

.718″ – .781″ Used to modify or remove fixed choke from barrel


.656″ – .718″ Used to remove or modify fixed choke in barrel.

Reamer, Tap and 5 bushings Which Choke Tube Style Should I Thread My Barrel for? Rem-Choke® & Win-Choke® style tubes are thicker and generally more available in local sporting goods stores. Tru-Choke™ Standard tubes are thinner, and Tru-Choke™ Thinwall style tubes are thinner yet, so a wider range of barrels can be threaded to accept…


Steel Tap is used to chase or re-thread the mounting threads for AR-15 buffer tubes. 1 3/16 – 16 TPI NO AVAILABLE TAP HANDLE

Steel Die is used to chase or re-thread the mounting threads on AR-15 Flash Hider. 1/2″x28

Paperback, 8.5×11 176 pages. Sherman L. Mays assembled this how to manual from his considerable experience checking for a living. He has taught many others to checker and for this reason his book is excellent at showing the novice how to get started and the mistakes to avoid. His easy going and often humorous style…


9/16×24 LH Includes a thread alignment tool (TAT). When using a TAT make sure the tool never touches the end of the barrel, only the pilot. If the TAT is allowed to touch the muzzle it is like the tools will be damaged or you will damage your new threa

These simple tools allow you to keep the barreled action properly aligned in the stock during the inletting process. Without them it is very difficult to get a tight inlet. 98 Mauser Springfield 03, 03-A3 and Krag actions Remington 700, 721, 722 Savage 110 Winchester 70 Sako

These simple tools allow you to keep the barreled action properly aligned in the stock during the inletting process. Without them it is very difficult to get a tight inlet. 98 Mauser Springfield 03, 03-A3 and Krag actions Enfield 1914, 1917 and SMLE CZ 550 or 7.7 Jap Arisaka Remington 700, 721, 722 Winchester 70…

These simple tools allow you to keep the barreled action properly aligned in the stock during final fitting. Recommended by stockmakers, these Forster Stockmakers Hand Screws are used in the final accurate fitting of the stock to the action. These screws are precision made and hardened to make repeated trial fittings. Set of two. To…

Shipping Now! We spoke with leaders in the tool making industry about the things they spend most of their time and effort educating clients about. Contributions from Clymer, Forster, Manson, JGS, PTG, SAAMI and more are all included. There are books for machinists that teach this type of information, but until now there has never…

This is the fifth book in the Gunsmithing Student Handbook Series. The authors teach the theory & physics of triggers in general and use many specific firearms to help students understand. There are numerous systems common in various firearms, this book aids you in understanding these systems. With that knowledge you can study and understand any trigger that comes your way.

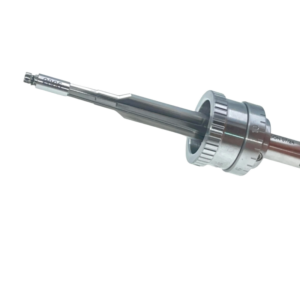
This device is added to your chamber reamer to control the depth of your cut. The micrometer adjustment allows you to fine tune your chamber depth in .001” increments. Produced in the United States here in Michigan by Bauduin Accuracy and Machine. Download JB Reamer Stop Instructions


Fits most any 1911 slide. Designed to remove, install, and adjust the rear sight and not mar the handgun.

Precision, repeat-ability, and ease of use: these are the benefits of P. O. Ackley Micrometer Reamer Stop. Now you can do production runs with your Chamber Reamer, without having to index each workpiece axially. You’ll be assured of consistent headspace, chamber after chamber! To set up, insert your Chamber Reamer shank in the Reamer Holder…
Steel Die is used to chase or re-thread the mounting threads on muzzle brakes or suppressors. 14×1 LH
Steel Die is used to chase or re-thread the mounting threads on muzzle brakes or suppressors. 5/8″x24

The Liberals at YouTube don’t want you to learn how to reload your own ammo. Learn how-to make hand loaded ammunition tailored specifically for YOUR needs. This course is far more in depth than any other reloading course on the market. Renowned cartridge designer, gunsmith, and AGI instructor Fred Zeglin begins this course by addressing…

Seems like a lot of money… Why should I do this? For a short description click here. Rental Protection Plan (RPP) units as described below, once purchased, remain in effect for all future orders until protection plan units are utilized for damages on an invoice. So this plan clearly benefits repeat customers the most. Rental…

A wildcat cartridge is a cartridge that is not commercially loaded by a major ammunition manufacturer, but could be loaded by a specialty or contract reloader. Taming Wildcats: How To Design & Fabricate Custom Cartridges. Is one of AGI’s courses, taught by custom gunsmith Fred Zeglin, renowned cartridge designer and builder of the well-known Hawk series…


Easily Drill and Tap your action for scope mounts. fits receivers from .630” to 1.440”

No products in the cart.
|
Uploaded
Failed
|
 |