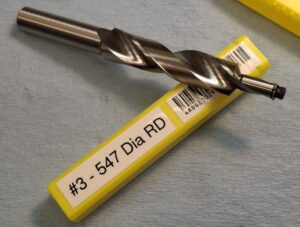
Using Forster “Piloted Roughing Drills”
We often have clients ask about roughing reamers. We have never carried them because that would more than double our inventory costs and would not come close to paying for the expense.
In 2025 Forster started offering a new batch of tools, “Piloted Roughing Drills”. They are offered in three (3) pilot size ranges. The # references of the pilot bushing are the same references used by most of the reamer makers in the market today. These bushing are nominally .500” long. #1 bushings have an internal diameter (ID) of .189”. #2 bushings have an ID of .220” and finally the #3 bushings have an ID of .252”.
| Piloted Roughing Drills available (by pilot ID size.) | ||
| #1 Is for 22-243 caliber | #2 Is for 25-29 caliber | #3 Is for 30-49 caliber |
| .344” Diameter | .413” Diameter | .348” Diameter |
| .413” Diameter | .438” Diameter | .500” diameter |
| .438” Diameter | .500” Diameter | .516” Diameter |
| .547” Diameter | ||
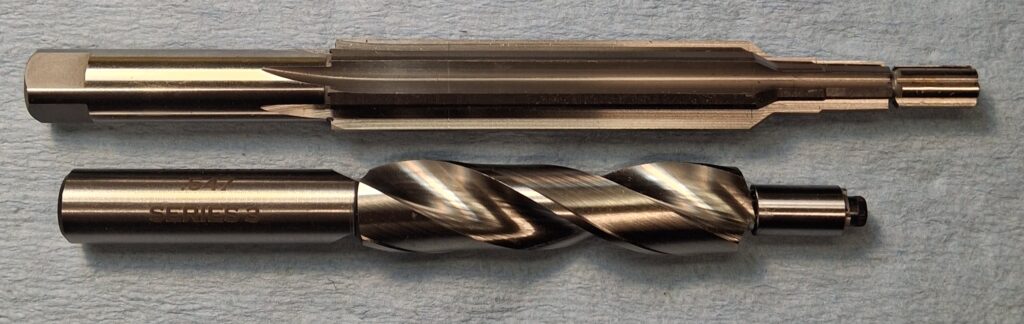
The diameter of the roughing drill must be smaller than the shoulder diameter of your chamber! The roughing dill is only cutting the body of the chamber. The reamer takes care of the neck and throat as well as completing the finished diameter of the body and the taper of the cartridge in the chamber. The drive shank on these drills is 7/16″ the same diameter as most modern chamber reamers.
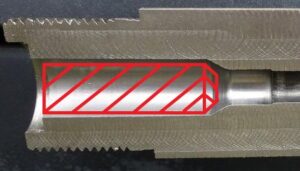
Piloted roughing drills allow you to remove large amounts of material from the chamber body area faster than with a roughing reamer. The red lines in the image on the right show what the drill can remove.
The pilot keeps the cut concentric with the bore. This is meant to help reduce wear and tear on the finish reamer and help save time without sacrificing accuracy. Designed to work with standard reamer pilot bushings the drill comes with a retaining screw and washer to use the bushing off the finish reamer. Not to be used in a hand drill.
Piloted Roughing Drill Instructions:
Determine how deep to pre-drill the chamber. The best way to find this depth for using the piloted rough drill is by knowing how much unsupported case you will have from the back of the barrel when the chamber is properly headspaced. Subtract that number from the base of the case or headspace gauge and measure from that point to the body shoulder junction. (subtract another .050-.100” so that you do not drill too deep.) Some chambers may require the you make more than one roughing cut, based on the length of the body and configuration of the finish reamer.
For example: in a Remington 700 action we have a .150” counter bore for bolt nose clearance, subtract that from the base to shoulder body junction measurement (our example cartridge is a 6.5 Creedmoor, so the base to shoulder/body junction is roughly 1.490” a safe number would be subtract .250” (as explained in previous paragraph) this would give a depth of cut with the drill of 1.240”.
Another consideration is that the pilot of the finish reamer must engage the rifling when you begin chambering to avoid damaging the reamer and avoiding chatter. When deciding how deep to rough (pre-drill) look at the finish reamer you will be using. How long is the area ahead of the shoulder on the reamer? See the images below.
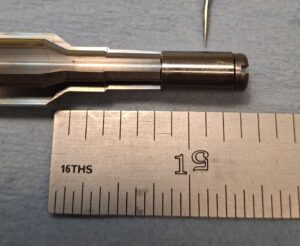
Notice the pointer lines up with 1.125″. For this example reamer that is the most you would want to rough before using the finish reamer. This is so that the pilot will be touching the rifling for about 1/2 its total length. It should be basic that the pilot diameter matches the bore of the barrel. Swap the bushing from the finish reamer to the roughing drill to match the fit. The depth of cut measurement is from where the shoulder on the drill starts cutting NOT the end of the pilot.
If you trust your measurements you can certainly get closer than this just don’t pass the body shoulder junction and account for how much case protrusion you have out the back of the chamber. Reamers vary widely in length so it is up to you to measure and work out the specifics of your chamber vs the finish reamer before your attempt to rough a chamber (pre-drill).
Reference Material:
Chambering Rifles for Accurracy by Fred Zeglin & Gordy Gritters
Wildcat Cartridge Design by Fred Zeglin
Design and Forming Custom Cartridges by Ken Howell
The Bolt Action by Stuart Otteson


